Many people think that android phone screen repair always means spending hundreds of dollars at a service center. That’s not true! With the right tools, knowledge, and care, you can save a lot of money and even handle basic Android screen repair, mobile screen fixing, or even a simple cracked screen repair at home. Of course, not every smartphone display repair is DIY-friendly, but understanding your options for android phone screen repair will help you make smart and cost-effective choices.
1. Why Android Phone Screens Get Damaged
It’s frustrating when your phone slips from your hand or hits a hard surface. Common causes of screen damage include:
- Accidental drops – Most cracks happen when phones fall on concrete or tiles.
- Pressure damage – Sitting on your phone or putting it in a tightly packed bag can crack the screen.
- Liquid exposure – Water or sweat can seep into your screen and damage the display.
- Scratches – Even minor scratches can affect touchscreen responsiveness over time.
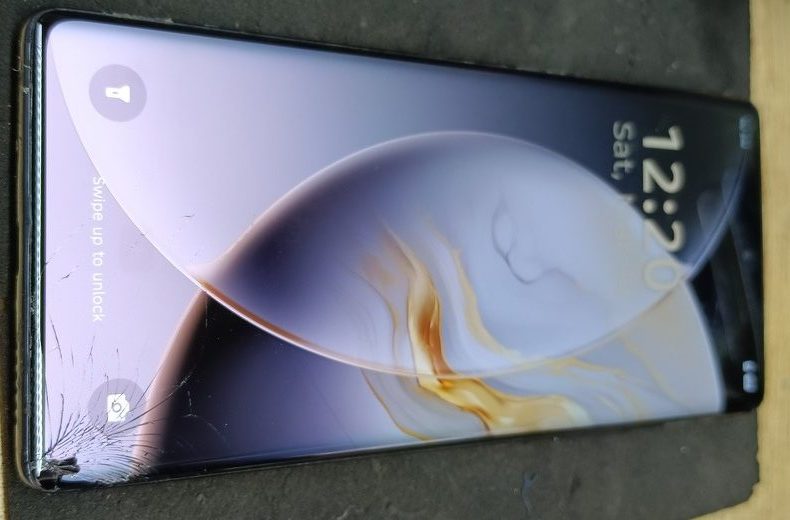
Signs of a damaged screen are easy to spot: flickering display, unresponsive touch, black patches, or visible cracks. Recognizing the problem early can save your phone from further damage.
2. DIY Android Phone Screen Repair Guide
If you’re someone who loves saving money and learning new skills, Do It Yourself screen repair is a great option. Here’s a step-by-step guide:
Step 1: Gather Your Tools
For Android phone screen repair at home, you’ll need:
- Screwdrivers for your phone model
- Suction cups to lift the screen
- Plastic spudgers to separate glass safely
- Adhesives for reattaching new glass
- A replacement screen or LCD
Step 2: Remove the Old Screen
- Power off your phone and remove any SIM/memory cards.
- Use a suction cup and spudger to gently lift the screen from the frame.
- Disconnect cables carefully to avoid damaging other components.
Step 3: Install the New Screen
- Place the replacement LCD or touch glass into the frame.
- Reconnect all cables and test the touchscreen before sealing.
- Use adhesive strips to secure the screen and avoid gaps.
Step 4: Test Your Phone
Turn on your phone and check touch sensitivity, brightness, and display colors. This ensures your DIY repair was successful.
3. When to Choose Professional Repair
Not every screen issue is DIY-friendly. Some problems require professional attention:
- Severe LCD damage with black or flickering screens
- Phones under warranty
- Water damage affecting internal components
Finding the right service:
- Search for “screen repair near me” or trusted local shops
- Compare costs: sometimes a professional repair is cheaper than a failed DIY attempt
Tips for choosing repair shops:
- Check reviews and ratings
- Ask for warranty on repair
- Make sure they use quality replacement parts
4. Common Android Screen Problems and How to Fix Them
Unresponsive Touch or Dead Pixels
- Clean the screen and restart the device first.
- If the problem persists, the touchscreen may need replacement.
Flickering or Black Screen
- Could be caused by a damaged LCD or software issues.
- Professional LCD replacement may be required.
Scratches and Minor Cracks
- For light scratches, DIY kits or screen protectors can hide damage.
- Deep cracks usually require replacement.
5. Cost of Android Phone Screen Repair
Repair costs vary depending on the phone model and the type of repair required:
- Samsung Galaxy series: $50–$150
- Google Pixel phones: $70–$160
- Other Android phones: $40–$120
In Pakistan, the cost of Android phone display repair mainly depends on the type of display used, such as OLED, AMOLED, or IPS. OLED and AMOLED displays are generally more expensive than IPS displays due to their advanced technology and better visual quality. On average, display repair costs in Pakistan can range from around PKR 2,000 to PKR 40,000, depending on the device model and display type.
DIY repair kits usually cost $20–$50, but professional repair ensures better quality, durability, and long-term performance.
Tips to Save Money:
- Always compare prices for parts and repair services
- Use protective cases and screen protectors to prevent future damage
6. Tips to Prevent Android Screen Damage
Prevention is always better than repair. Here are some simple tips:
- Use a durable case – Heavy-duty cases protect against drops.
- Apply a screen protector – Prevent scratches and minor cracks.
- Handle with care – Avoid putting the phone in tight pockets or dropping it.
- Regular maintenance – Keep your screen clean and dry.
7. Conclusion
Android phone screen repair doesn’t have to be expensive or complicated. Whether you choose a DIY fix or a professional service, understanding your options can help you save money and avoid further damage.
However, if you face any difficulty during the repair process or are unable to fix the screen yourself, it’s always better to seek expert help. You can contact our professional repair service for reliable solutions, high-quality parts, and long-lasting results.
👉 If you want a hassle-free Android screen repair with high-quality parts and expert service, click here
Follow the right steps, use proper tools, and make sure your device is handled safely to keep it working perfectly.
FAQs – Android Phone Screen Repair
Q1: Can I repair my Android phone screen at home?
Yes! Small cracks or glass replacements can be done at home if you have the right tools and follow a step-by-step guide carefully. Just be gentle with the connectors and test the screen before sealing it completely.
Q2: How do I know if my Android screen needs a full LCD replacement?
If your screen has black patches, flickering, dead pixels, or touch isn’t responding, it usually means the LCD is damaged. Minor cracks can be fixed with glass replacement, but severe issues need professional repair.
Q3: How much does it cost to repair an Android phone screen?
Cost depends on your phone model and type of repair. Samsung and Pixel phones usually cost $50–$160 for professional repair. DIY kits are cheaper, around $20–$50, but require careful handling.
Q4: Are DIY repairs safe for my Android phone?
Yes, for minor cracks or touchscreen replacement. But if your phone has water damage, a shattered LCD, or under warranty, professional repair is safer to avoid extra damage.
Q5: What tools do I need for Android phone screen repair at home?
You’ll need screwdrivers, suction cups, spudgers, adhesives, and a replacement screen or LCD. A DIY phone screen repair kit usually contains all these tools.
Q6: How can I prevent my Android phone screen from breaking again?
Use a sturdy phone case and a screen protector, handle your phone carefully, avoid tight pockets, and clean your screen regularly. Prevention is always better than repair.
Q7: How long does it take to repair an Android screen professionally?
Most professional repairs take 1–3 hours, depending on your phone model and the damage. Some repair centers can even fix it while you wait.
Q8: Can minor scratches on my screen be fixed without replacing it?
Yes! Light scratches can be removed using DIY kits or polishing methods. For deep cracks, replacement is the only reliable solution.
Q9: Is it worth repairing my old Android phone screen?
It depends on the cost of repair vs the phone’s value. For high-end Samsung or Pixel phones, repair is usually worth it. For very old or low-cost phones, sometimes replacement may be cheaper.
Q10: Where can I find affordable and reliable Android screen repair services?
Search for “screen repair near me” and check reviews, ratings, and warranty options. Choose shops that use quality replacement parts for better results.
Q11: Can water or liquid damage affect my screen repair?
Yes. Water can short-circuit the display or touch sensors. Always dry your phone thoroughly and consider professional repair for liquid damage.
Q12: Are DIY repair kits easy to use for beginners?
Most kits come with instructions and tools, but beginners need patience and care. Watching a video tutorial can make the process much easier.
Q13: Can I repair Samsung and Pixel screens the same way?
The general process is similar, but different models may have different screw placements, connectors, and adhesives. Always check model-specific guides before starting.
Q14: How do I test my screen after replacement?
Power on your phone, check touch sensitivity, brightness, display colors, and make sure there are no dead pixels. Testing before sealing the screen ensures everything works perfectly.
Q15: Can I use a cracked screen if it’s still working?
You can, but it’s risky. Cracks can worsen, touch may stop working, and small glass shards can hurt your fingers. Replacing the screen is always safer.